I. Symptom: Abnormal Noises
Noise is the most common indicator. Different sounds point to different issues.
1. "Whining" Noise
- Characteristics: Increases with vehicle speed; pitch may change when coasting.
- Likely Causes:
- Incorrect pinion gear backlash or worn ring/pinion gears.
- Worn bearings (pinion or differential case bearings) or incorrect preload.
- Diagnosis Flow:
- Lift the vehicle; confirm the noise is from the differential, not wheel bearings.
- Check differential oil level and for metal particles (on the magnetic drain plug).
- Use a mechanic's stethoscope to locate the exact source of the noise.
- Upon disassembly, use a dial indicator to measure gear backlash and check bearing play or damage.
2. "Clicking" or "Knocking" Noise
- Characteristics: Often occurs during turning; a pronounced clicking sound.
- Likely Causes:
- Worn or pitted side gears or planetary gears, causing excessive play.
- Worn planetary gear cross-shaft or failed C-clips.
- Diagnosis Flow:
- Listen for the noise while turning left and right with the vehicle stationary and in gear.
- Disassemble the differential carrier; inspect the planetary gear set and thrust washers for wear; measure gear play.
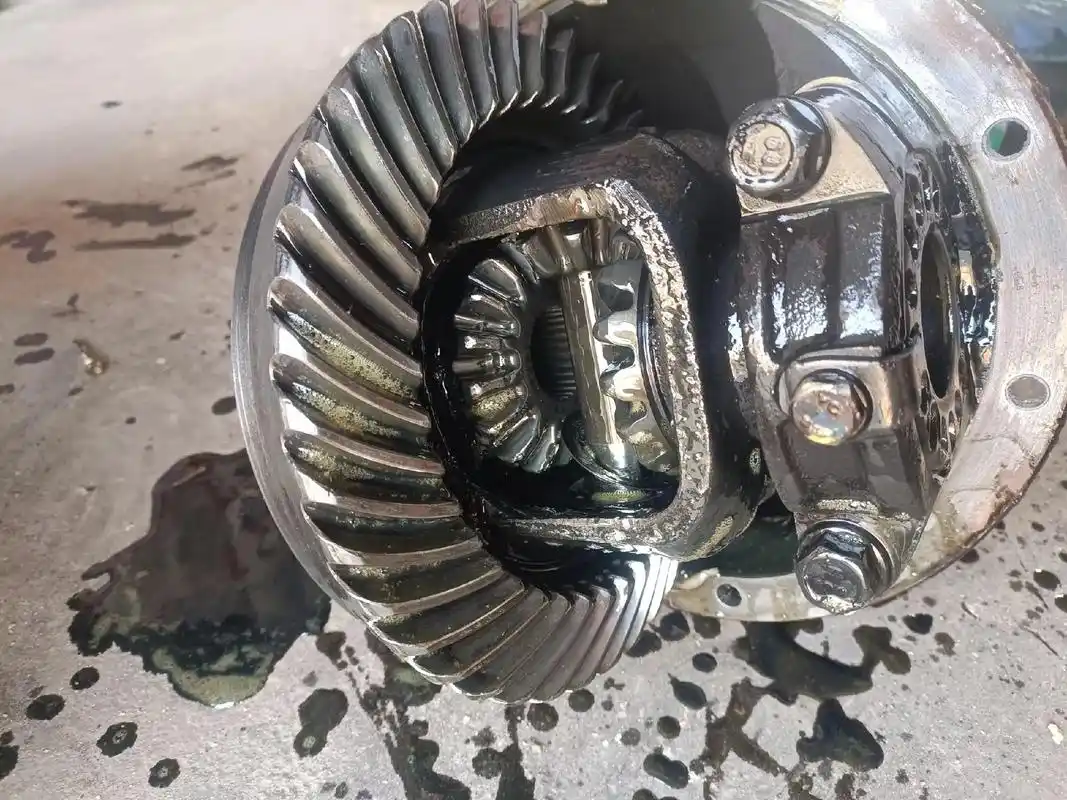
II. Symptom: Oil Leakage
Leaks lead to poor lubrication, accelerated wear, and ultimately catastrophic failure.
1. Common Leak Points:
- Differential Cover Plate: Degraded sealant or a damaged gasket.
- Pinion Seal: Located at the driveshaft connection; fails due to age and rotation.
- Axle Seals: Located where the axles enter the assembly; fail due to rotation and rubber degradation.
- Vent Plug: A clogged breather vent causes internal pressure to build up, forcing oil past seals.
2. Diagnosis and Repair Flow:
- Step 1: Clean and Identify
- Thoroughly clean the entire housing with brake cleaner.
- Run the vehicle briefly and identify the exact source of the fresh seepage.
- Step 2: Repair Based on Leak Point
- Seal Replacement: Remove the driveshaft or axle. Use a proper seal driver to install new seals, lubricating the lip first.
- Cover Leak: Drain the oil. Remove the cover, scrape off old sealant completely, apply new high-quality RTV sealant in a continuous bead, and re-torque bolts to specification in the correct sequence.
- Step 3: Final Check
- Refill with the correct type and quantity of specified differential fluid.
- Conduct a road test to confirm the issue is resolved.
- Re-inspect for leaks after a short drive.
Safety Notice: Always ensure the vehicle is securely lifted and supported on jack stands. Follow all manufacturer torque specifications and procedures.
